Invite & Manage Channels

Nancy Xiao
Accounts Manager
Channel Function allow you to securely share projects with builders, agencies, sales teams and other partners.
RealtyCMS provides two ways to share projects:
- Channel Management – Share projects with specific recipients using their email addresses.
- Invitation Links – Share projects using a public link without needing the recipient’s email address or a RealtyCMS account.
Method 1 – Channel Management
🏢 Step 1 – Open Channel Management
From the left-hand menu, go to:
Channel → Management
Here you'll see a list of all your existing channels.
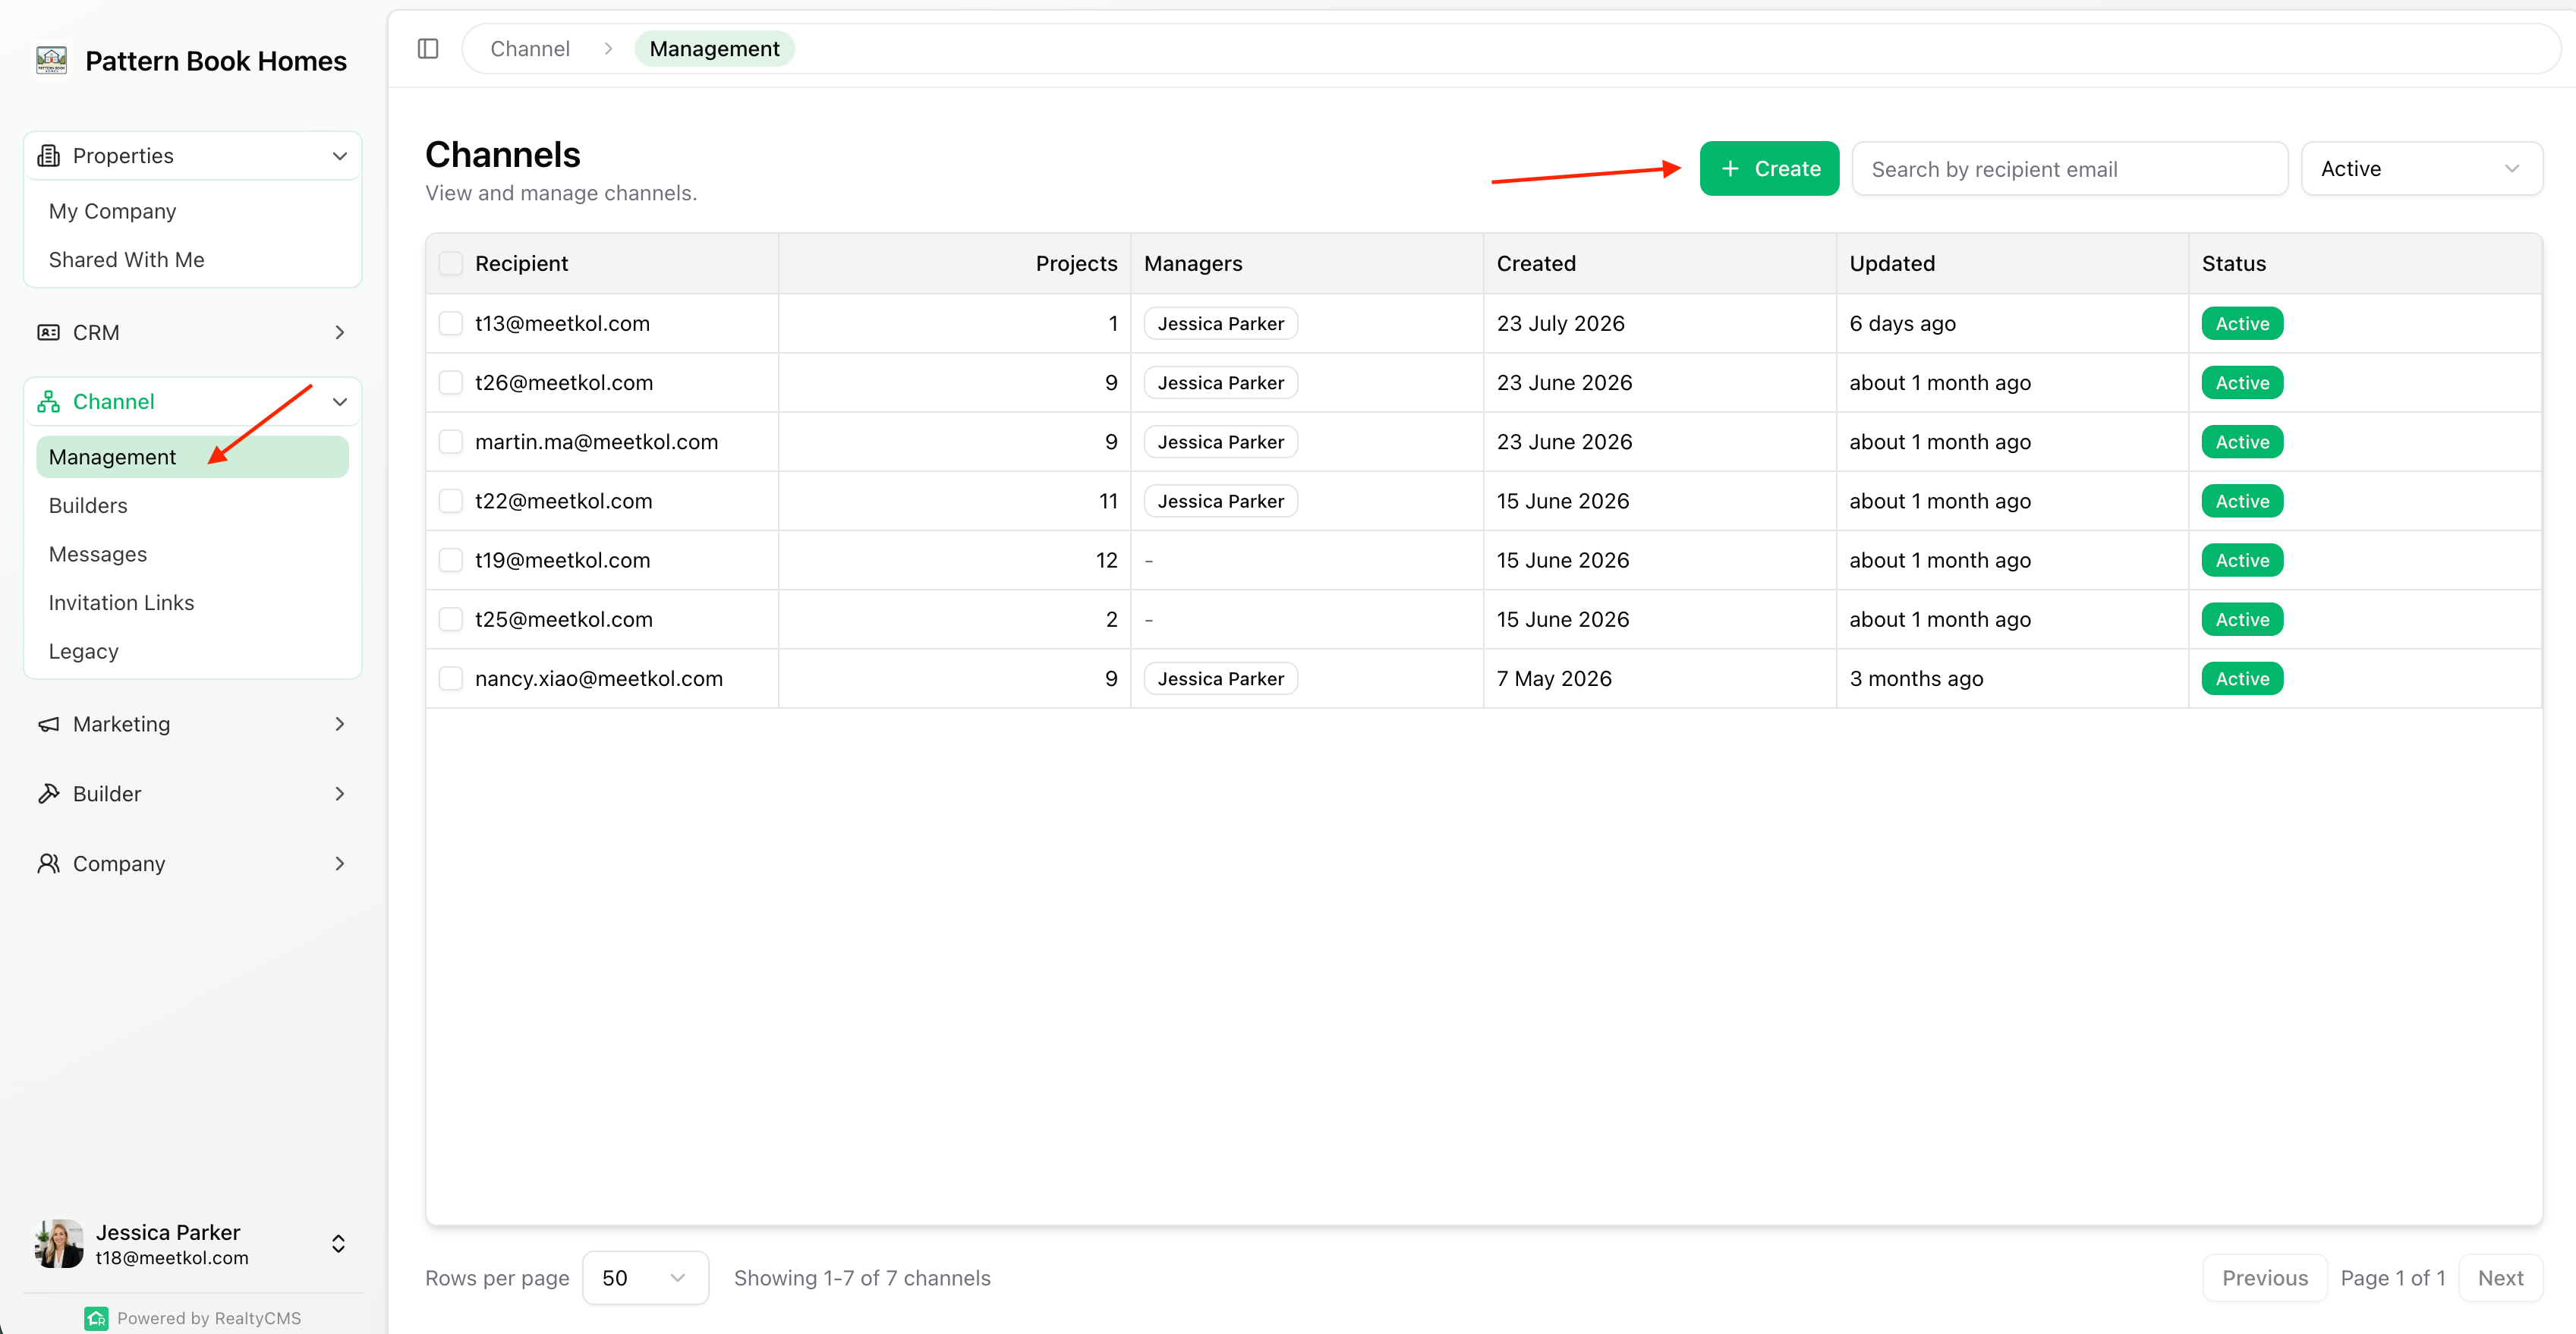
➕ Step 2 – Create a Channel
Click Create.
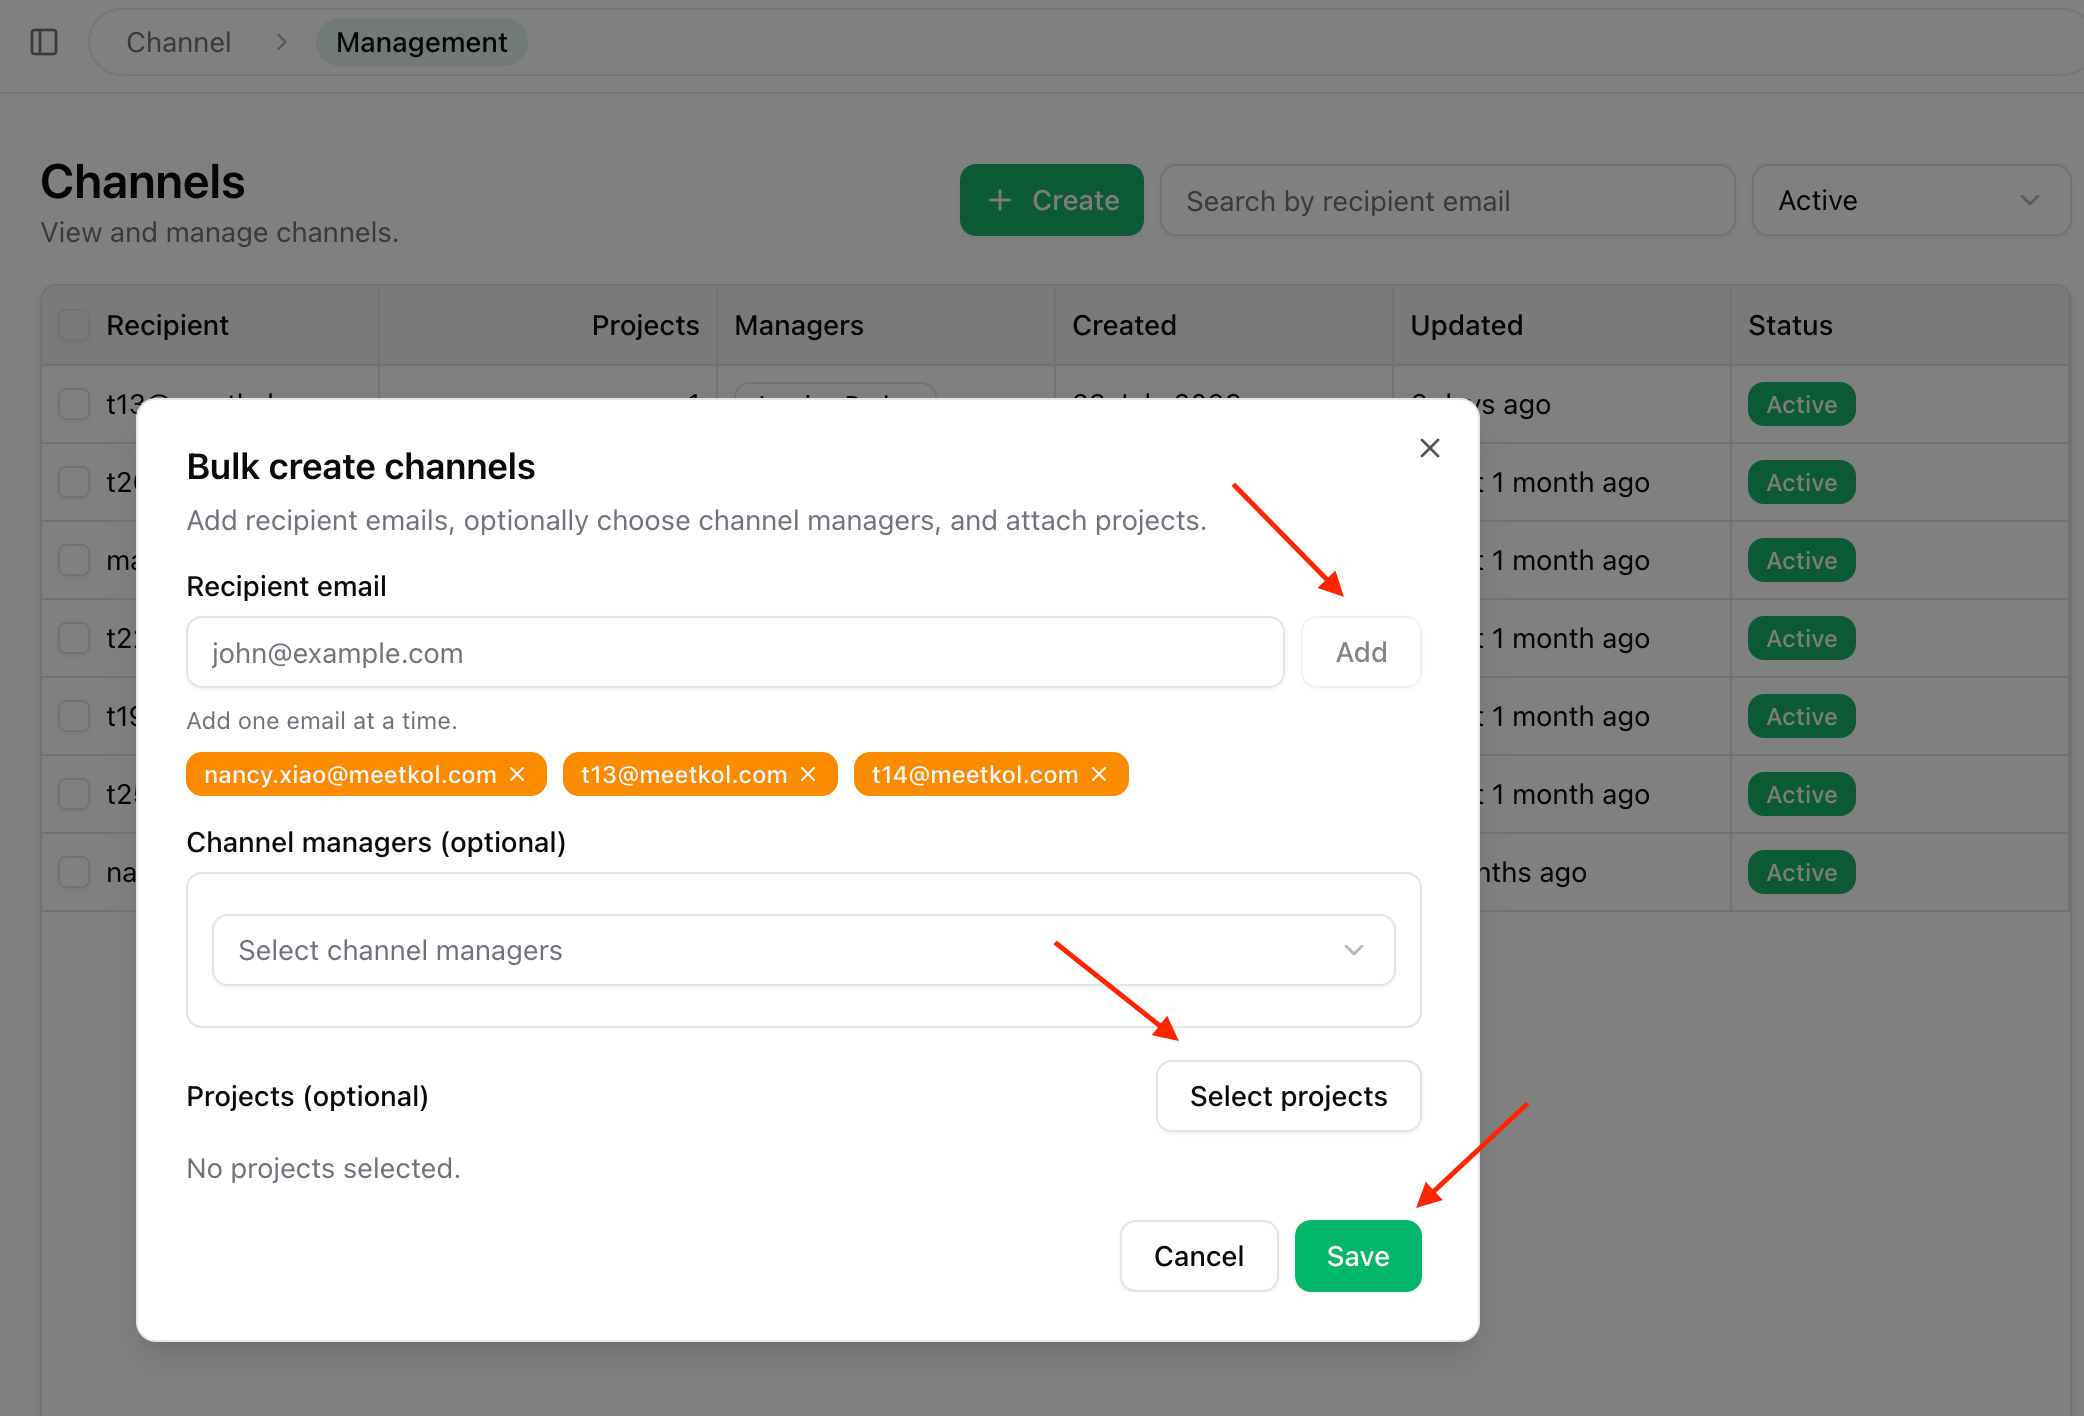
Enter the recipient’s email address, then click Add (You can add multiple recipients, but they must be entered one at a time—after each email, click Add before entering the next one).
Optionally, assign one or more Channel Managers.
Next, select the projects you want to share.
Click Confirm, then Save.
The recipient will receive an email notification with access to the shared projects.
✏️ Step 3 – Manage an Existing Channel
Select any channel to open its details.
From here you can:
- Add more shared projects
- Remove shared projects
- Update channel managers
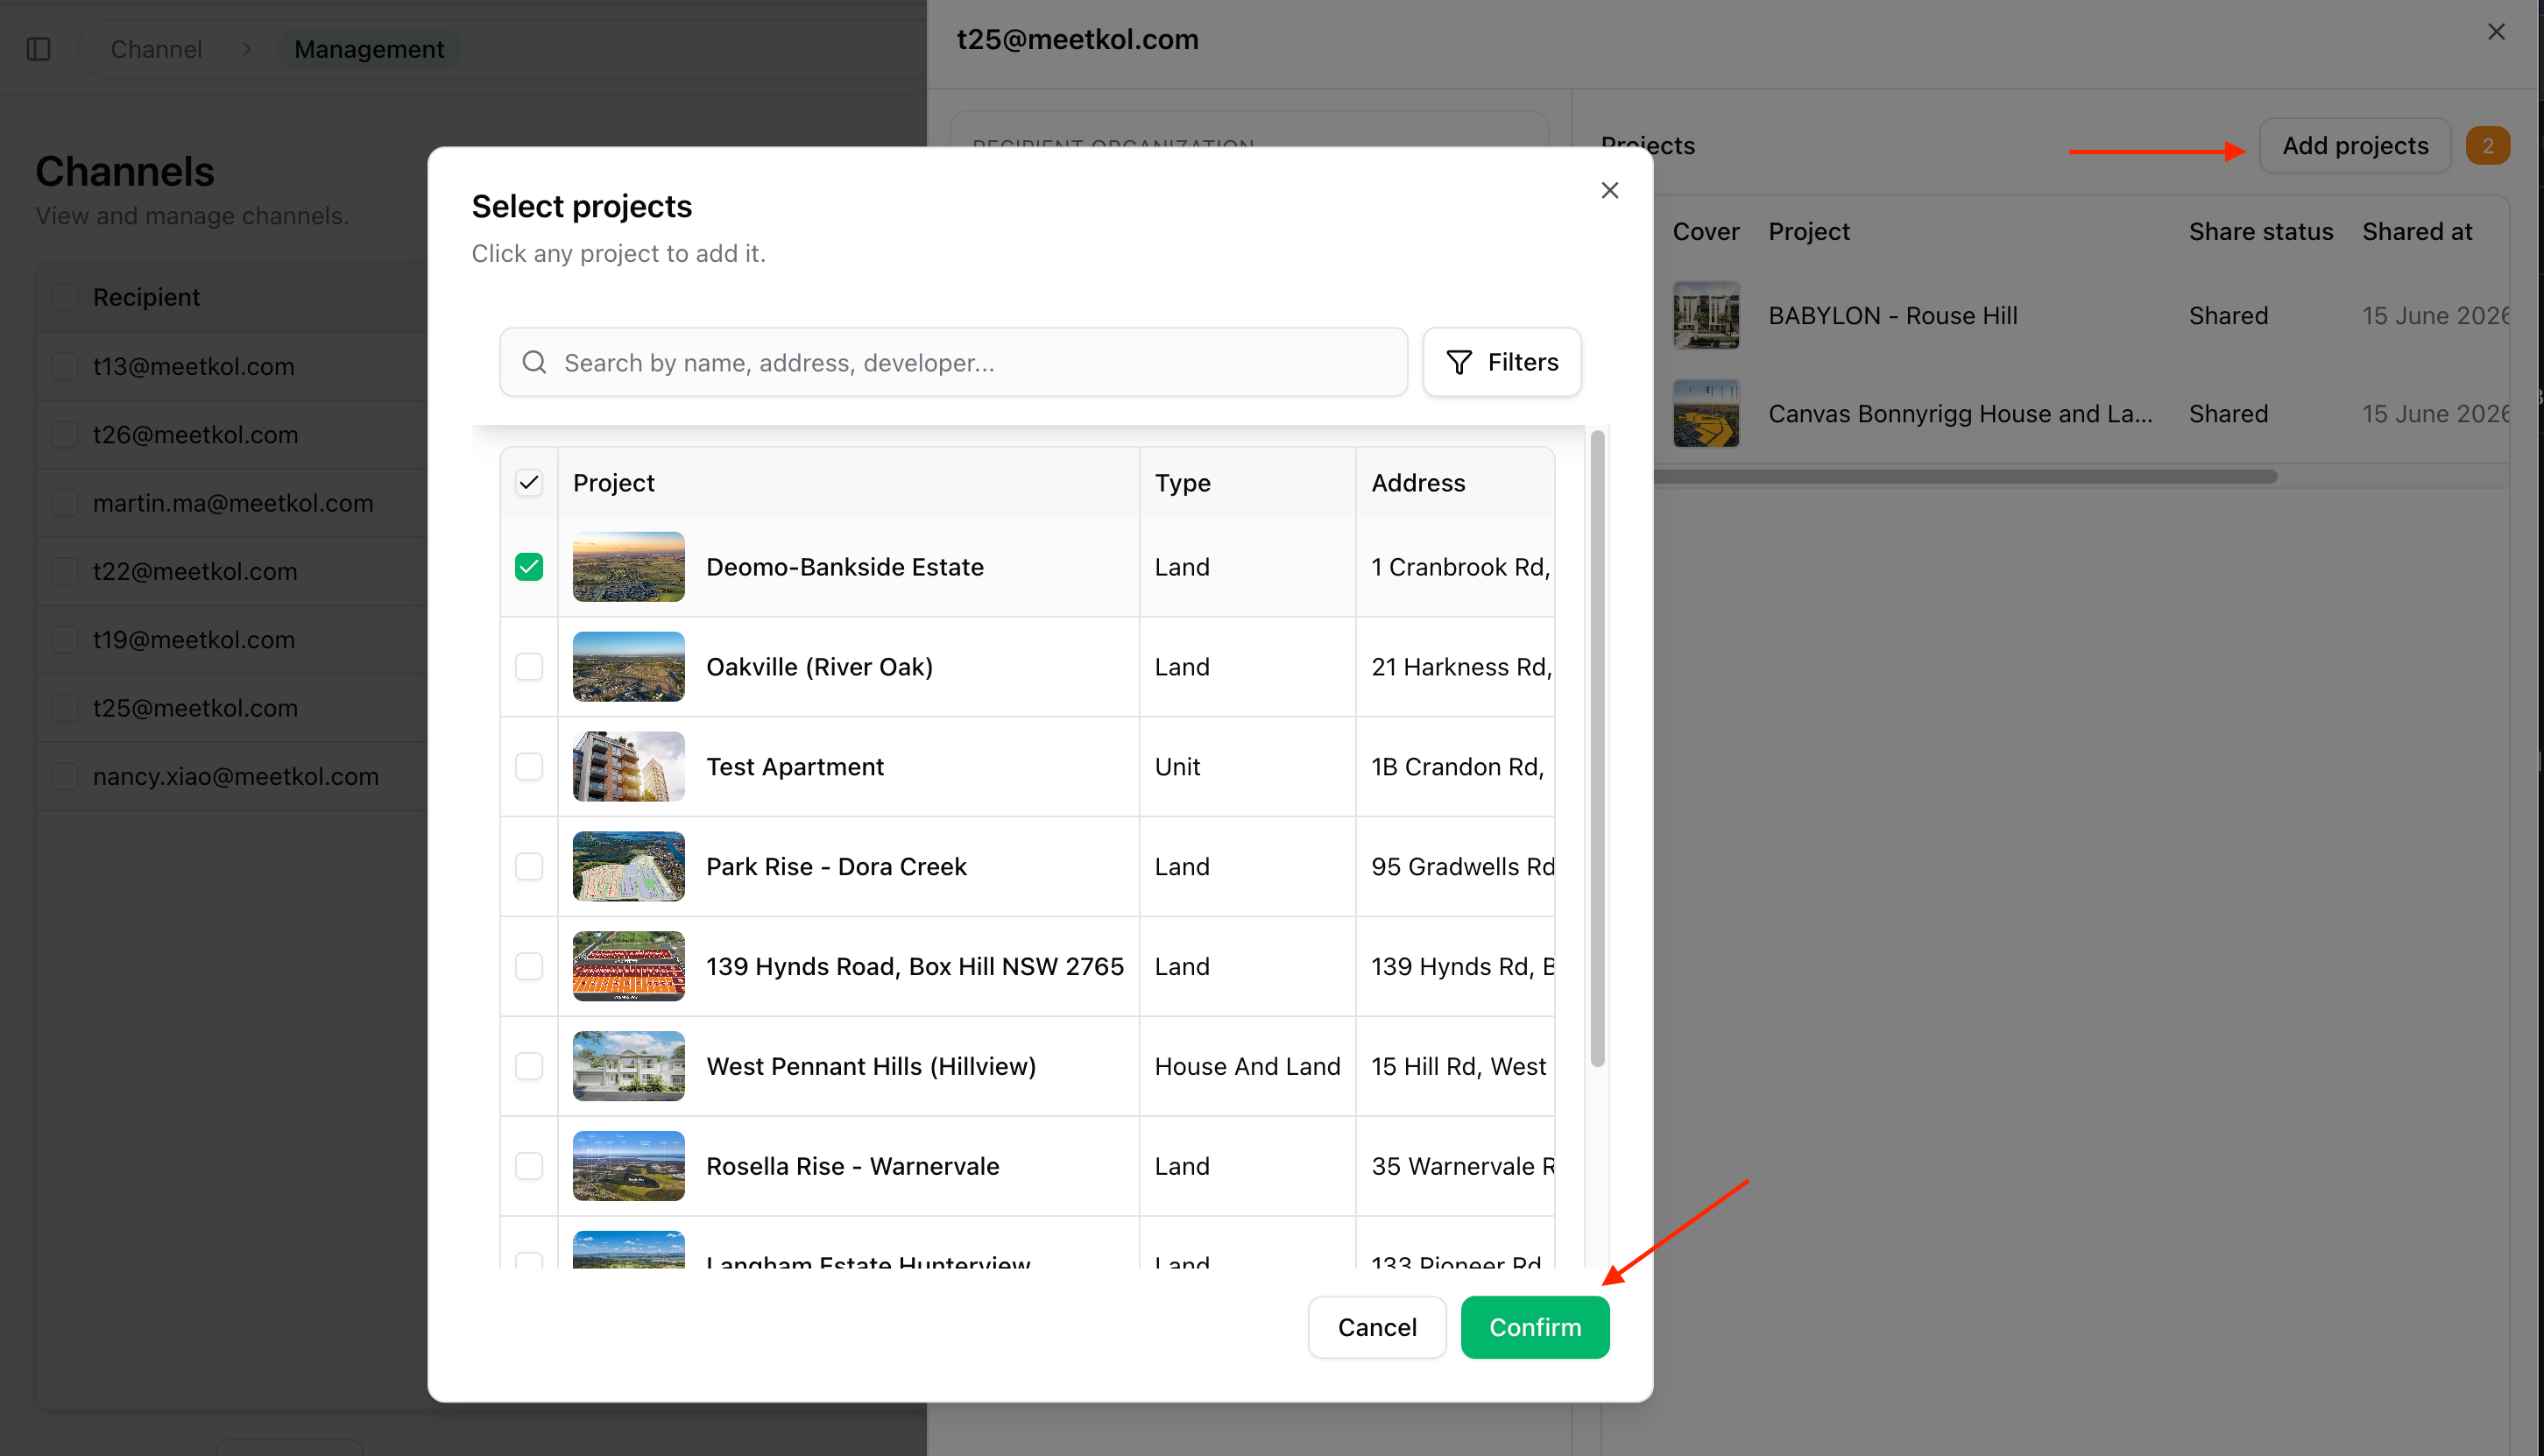
➕ Add More Projects
Click Add Projects, select the projects you'd like to share, then click Confirm.
➖ Remove Shared Projects
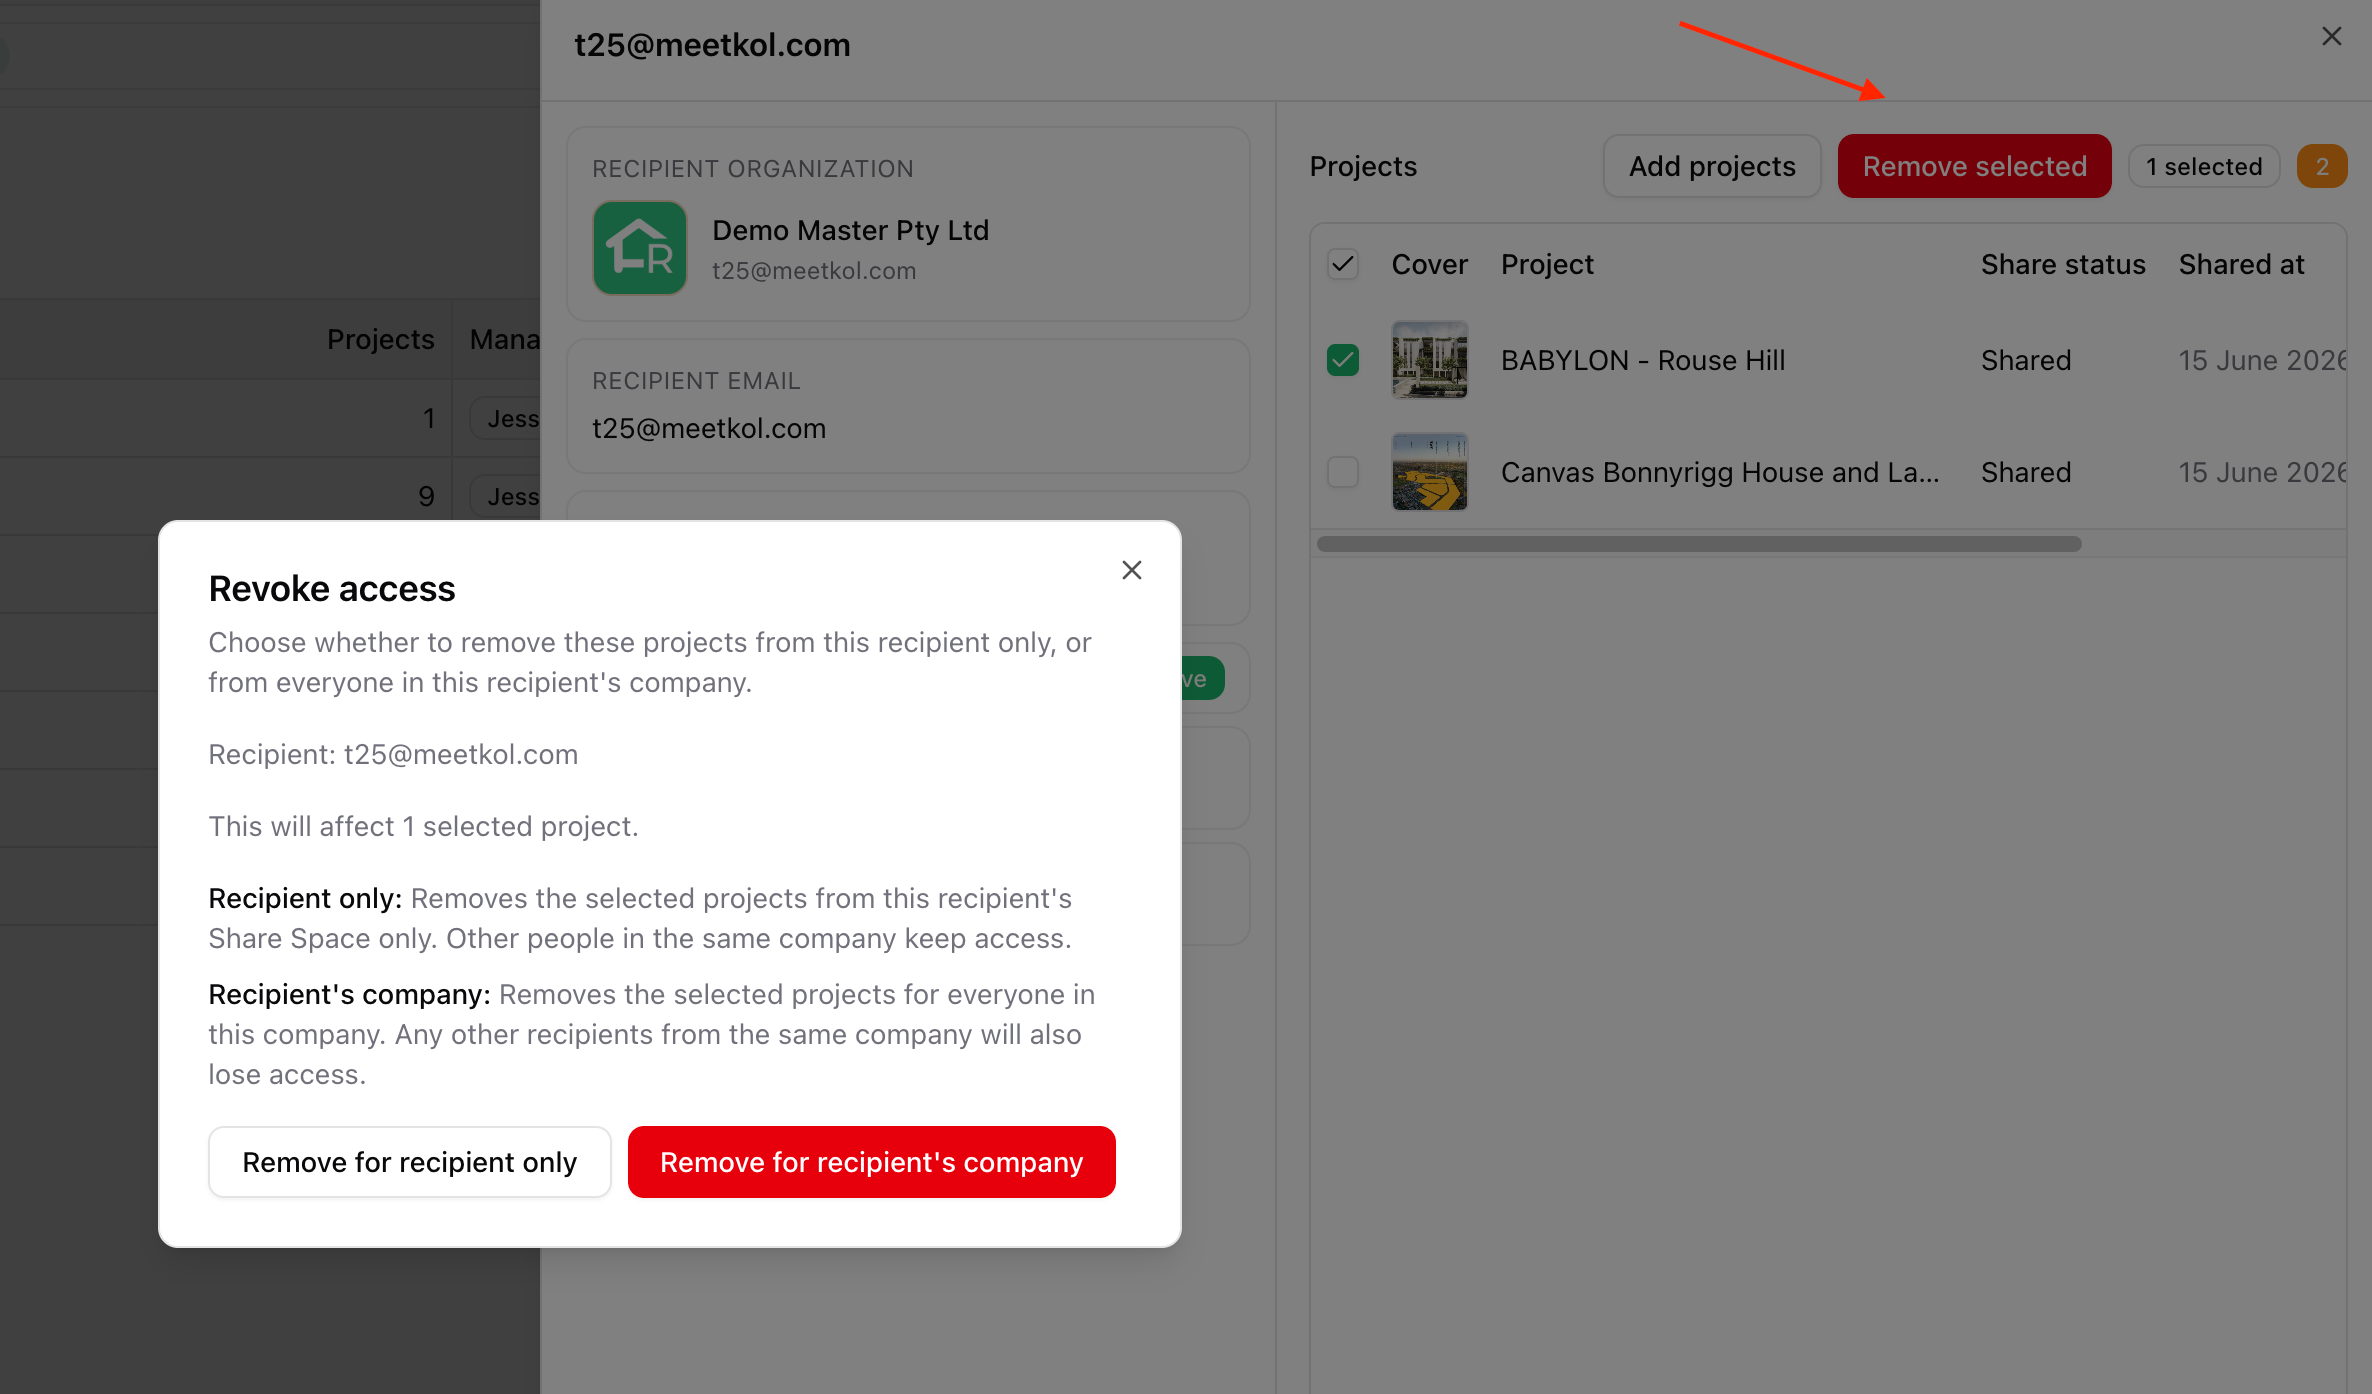
Select one or more projects, then click Remove Selected.
You'll see two removal options:
Remove for Recipient Only
Removes the selected projects from this recipient only.
Other recipients from the same organisation will continue to have access.
Remove for Recipient's Company
Removes the selected projects for everyone within the recipient's organisation.
All users from that company will lose access to those projects.
👤 Update Channel Managers
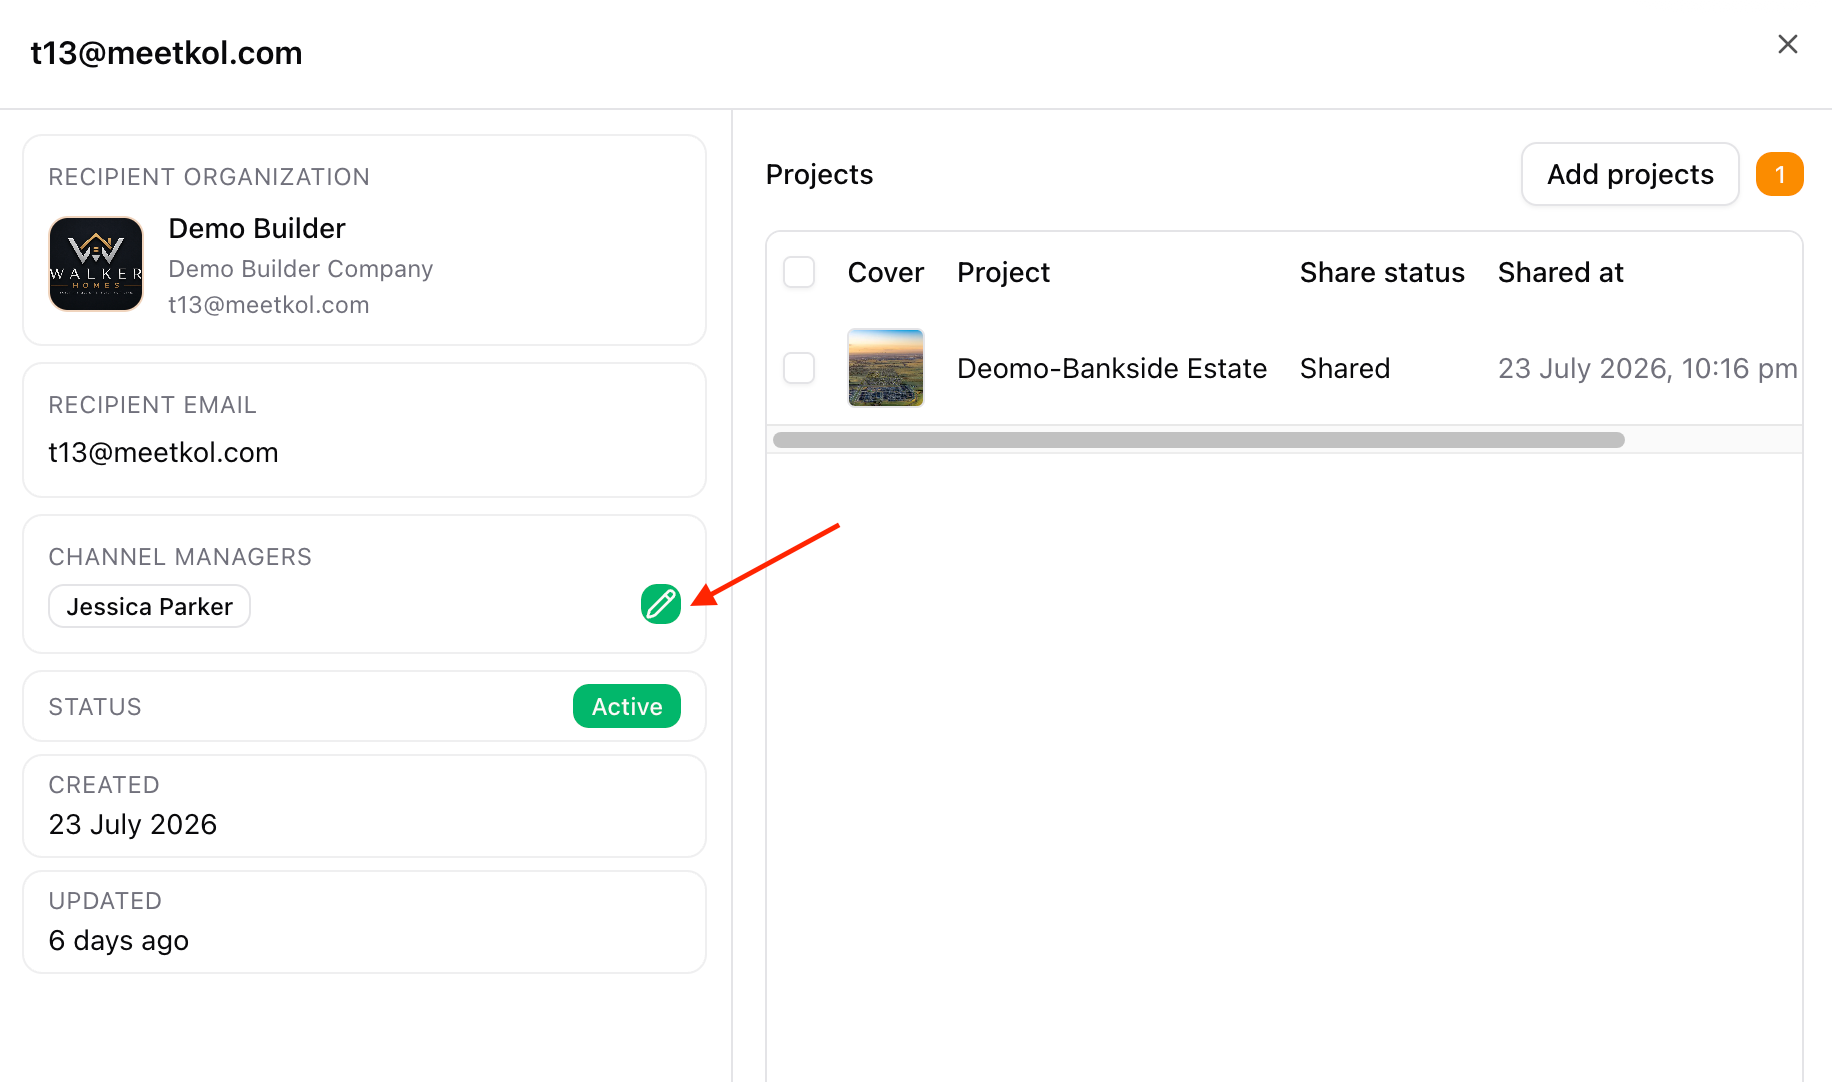
Hover your mouse over the Channel Managers field.
A green Edit (pencil) icon will appear.
Click the icon, update the assigned channel managers, then save your changes.
✏️ Edit Multiple Channels
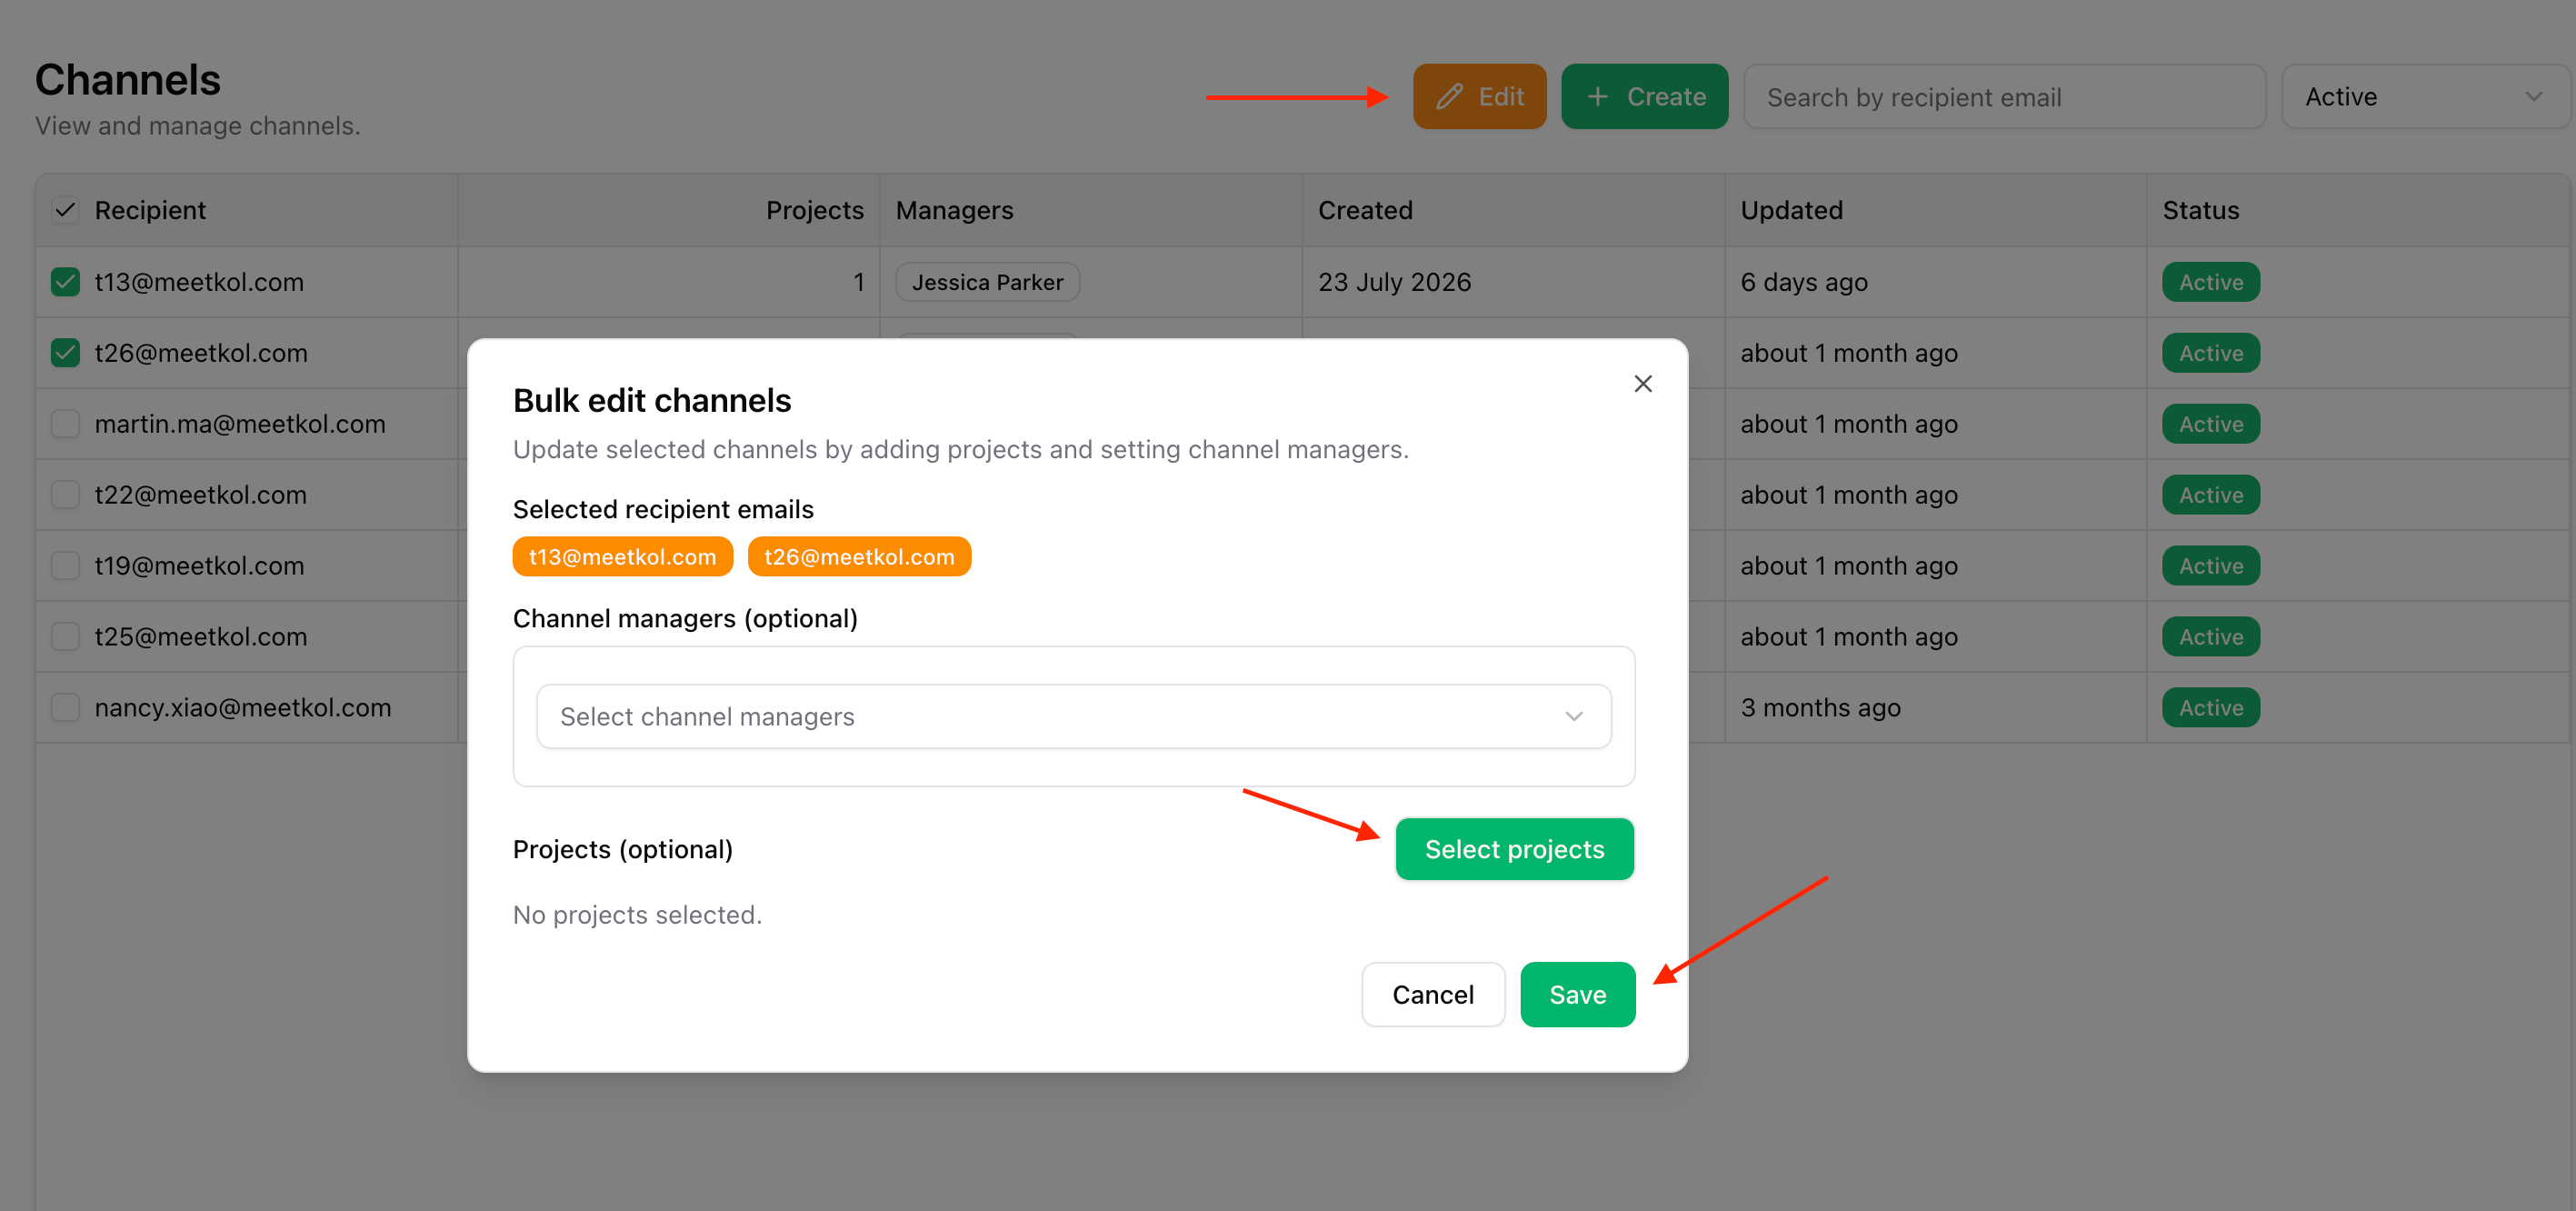
You can also add projects to multiple existing channels at the same time.
- Select one or more channels.
- Click Edit.
- Select the additional projects you want to share.
- Click Save.
Method 2 – Invitation Links
Invitation Links let you share projects without knowing the recipient's email address or requiring them to create a RealtyCMS account.
Anyone with the invitation link can immediately access the shared projects.
🔗 Step 1 – Create an Invitation Link
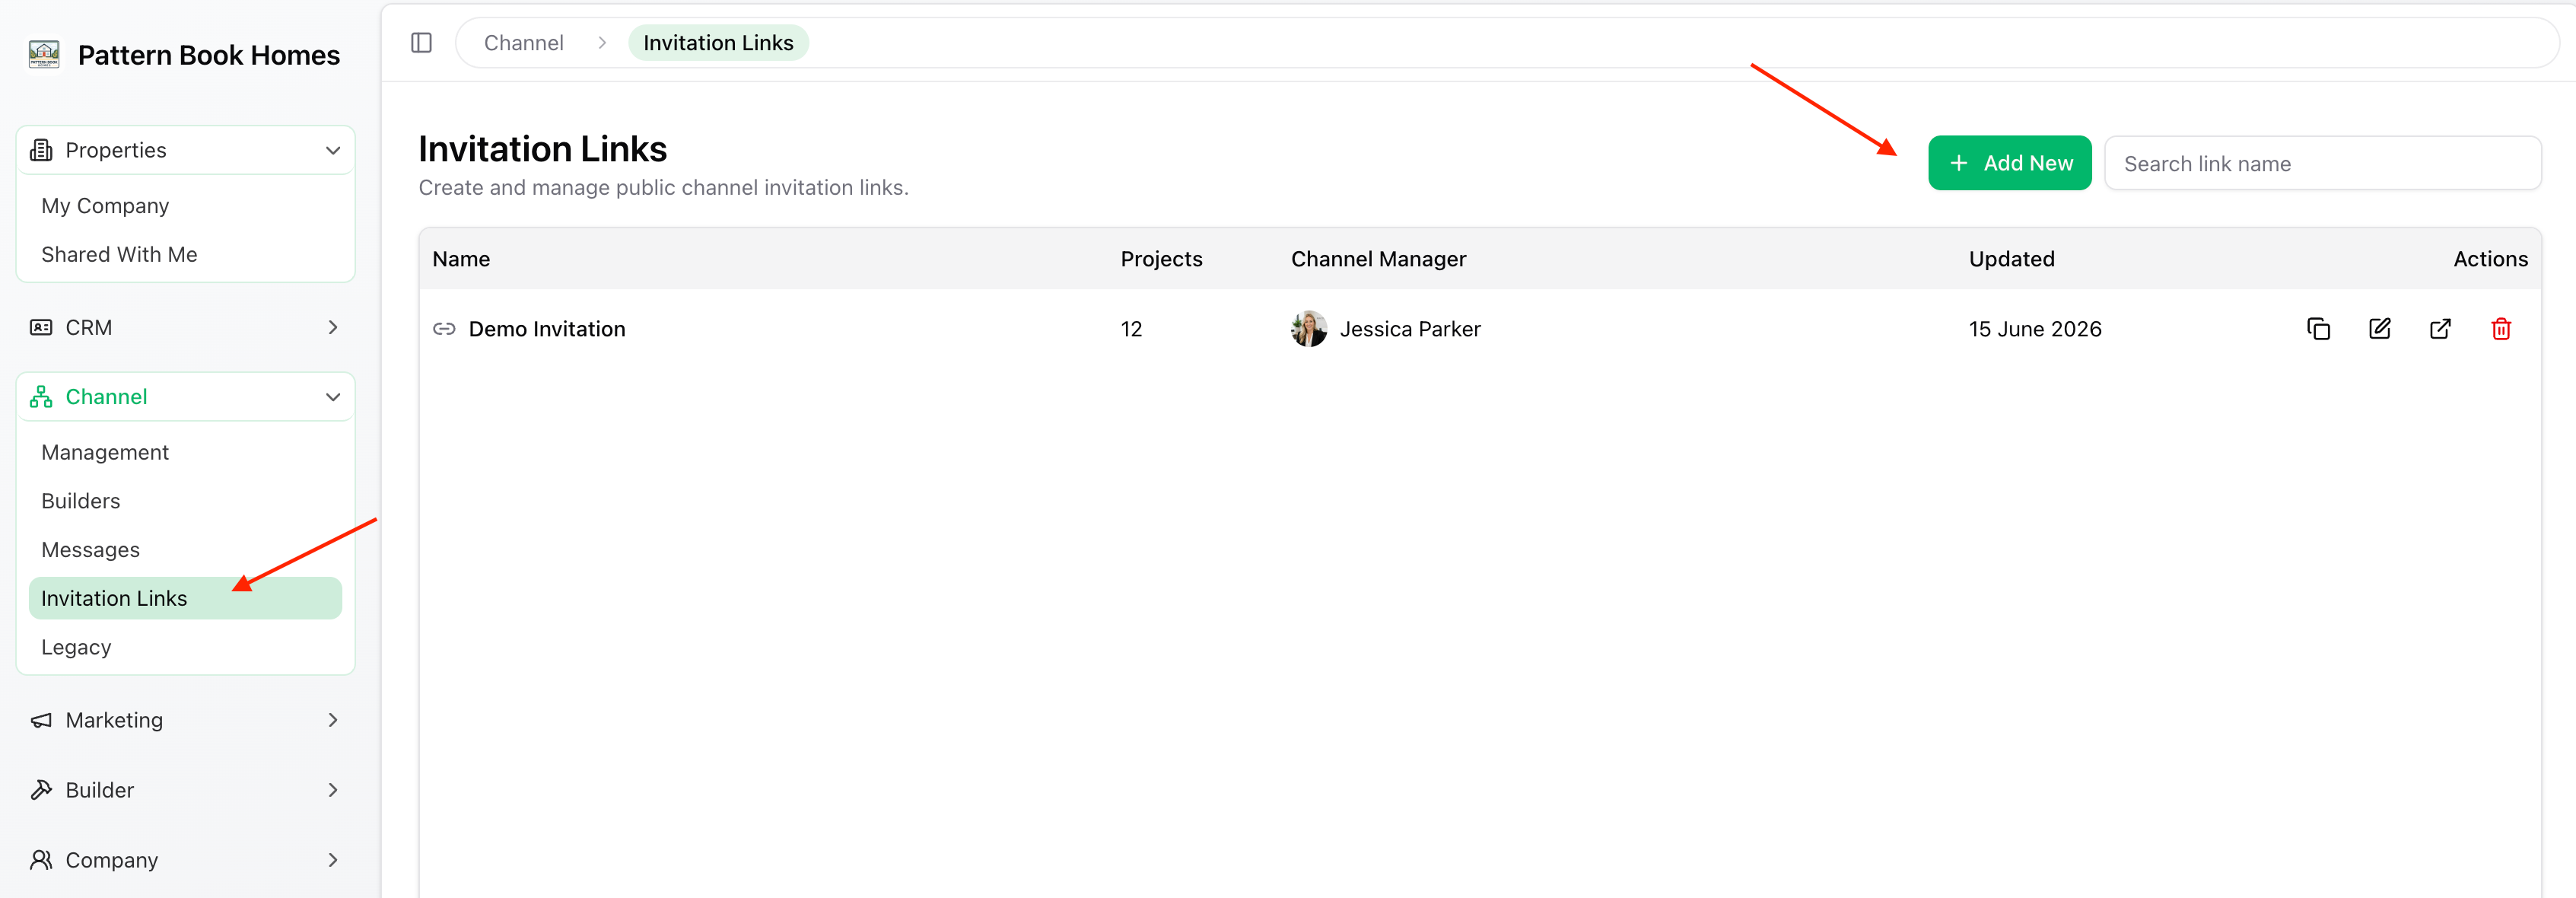
Go to:
Channel → Invitation Links
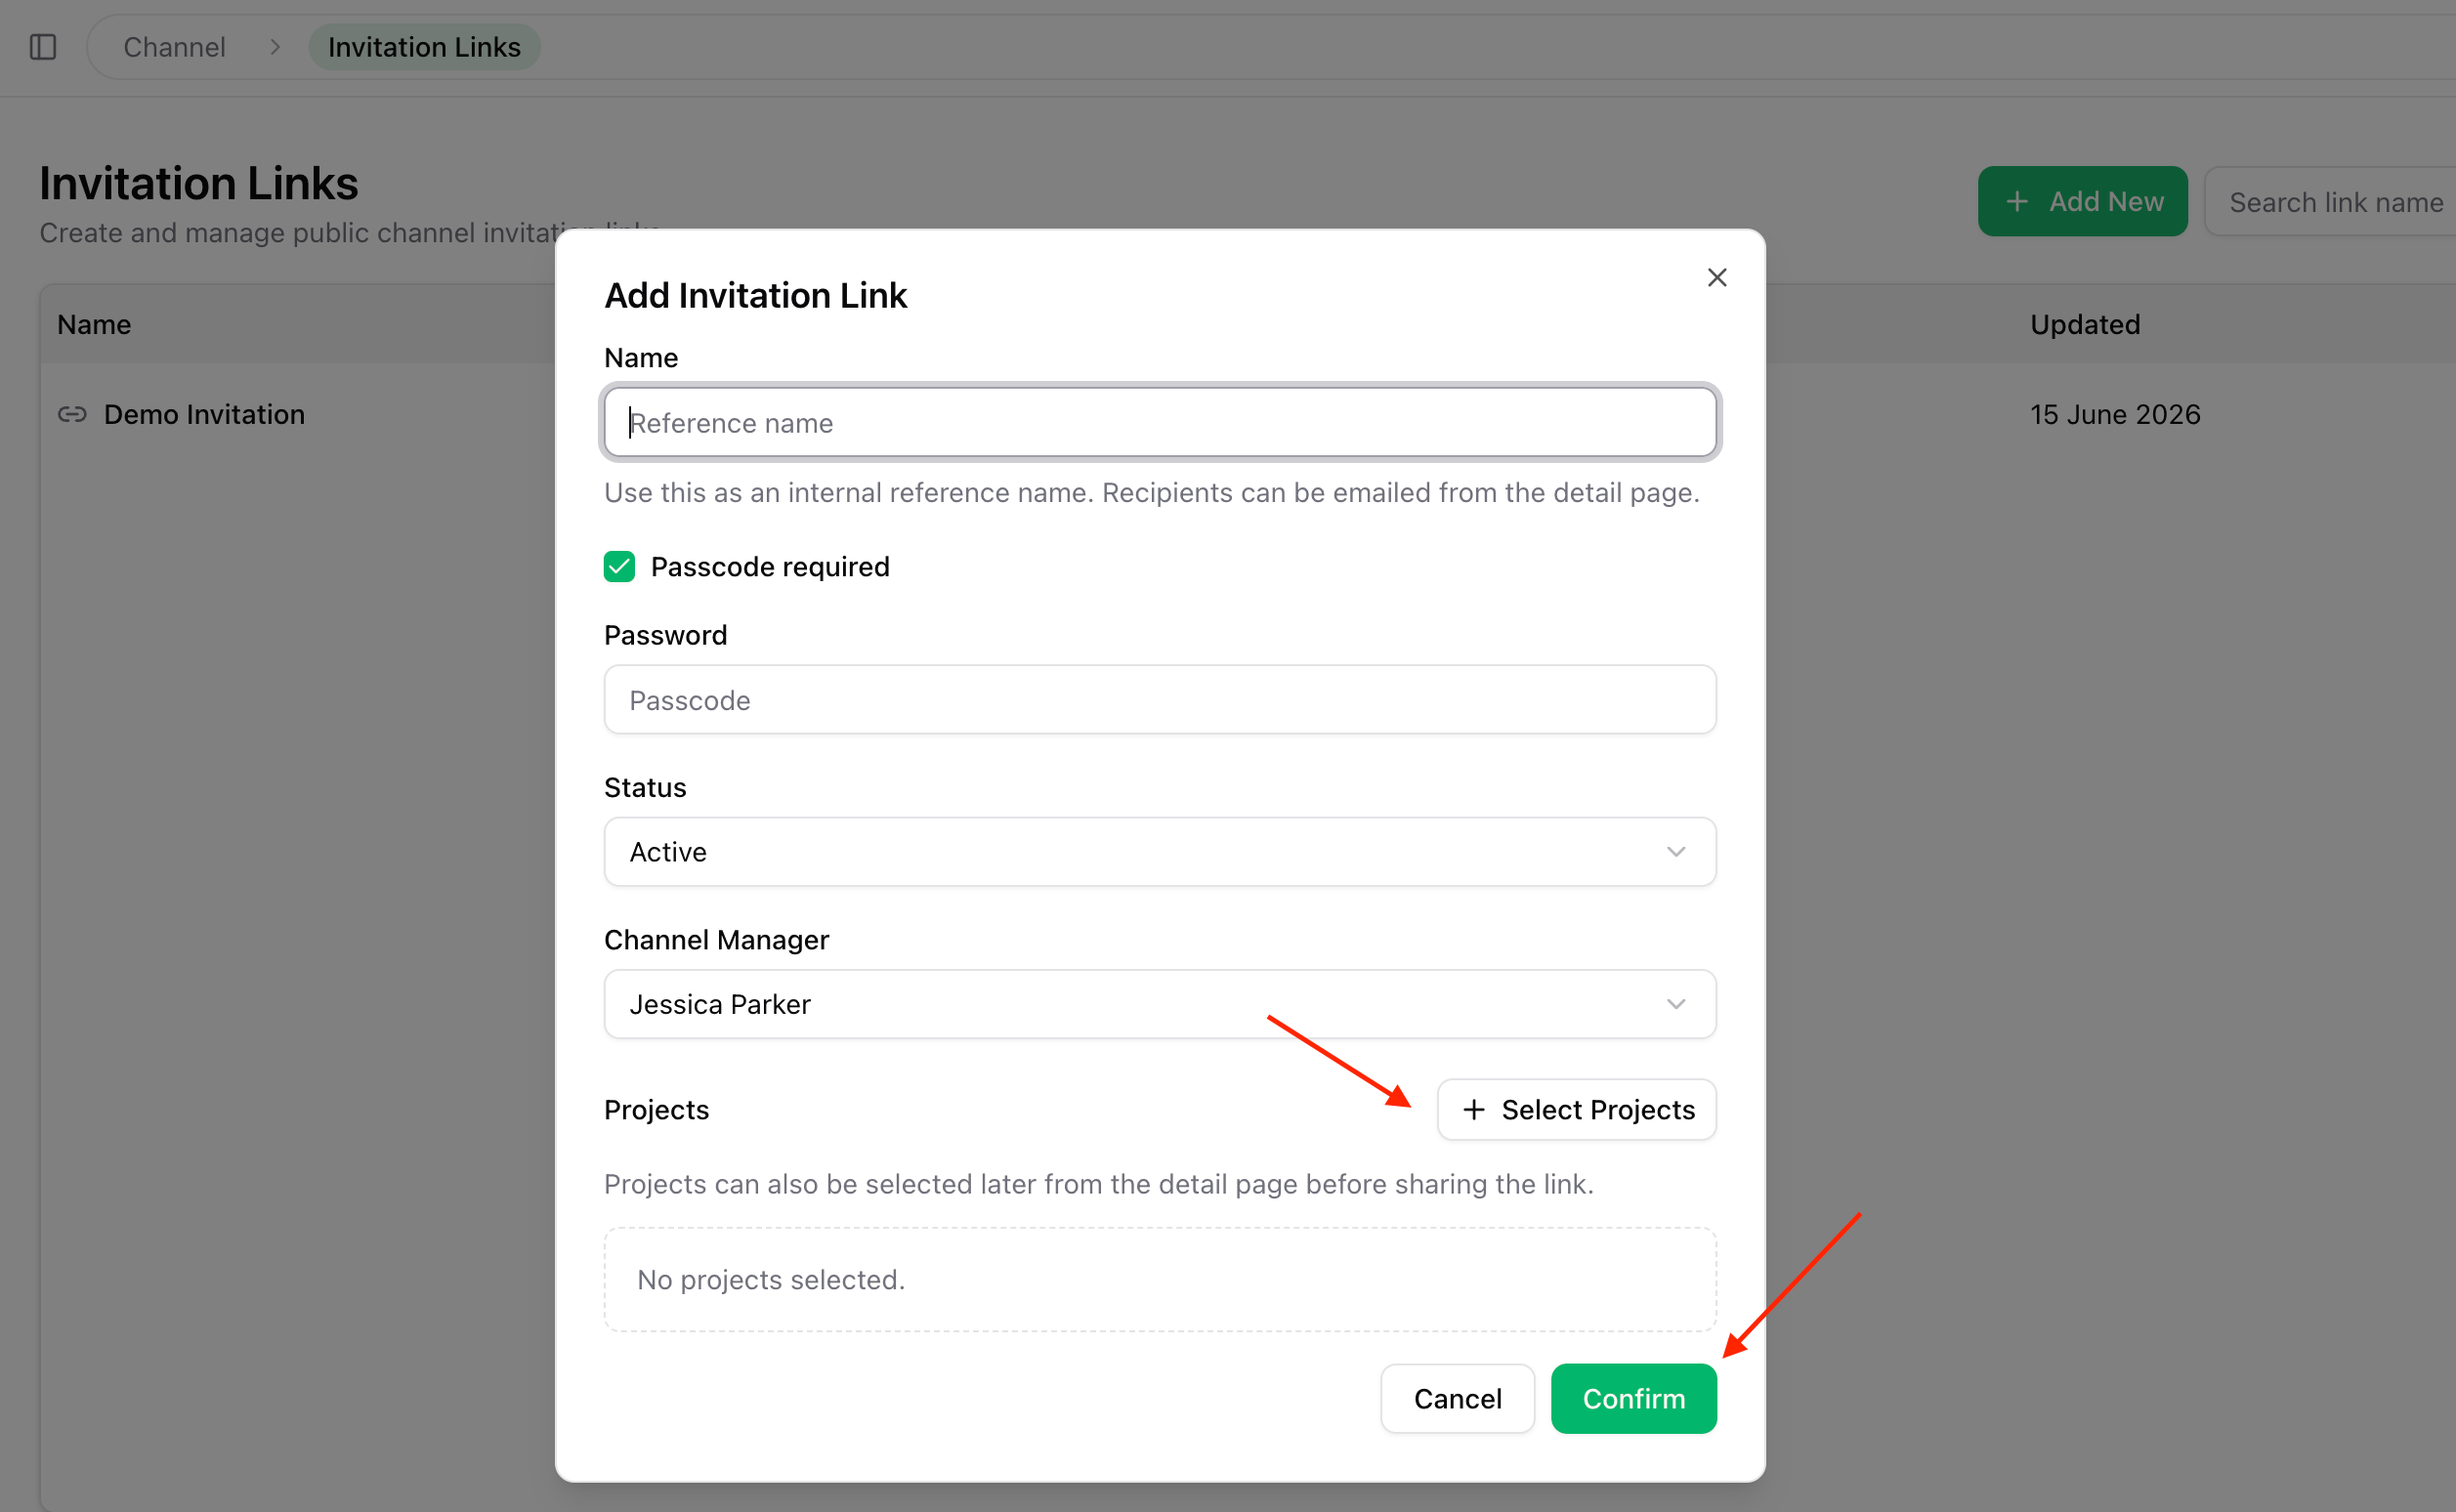
Click Add New.
⚙️ Step 2 – Configure the Invitation Link
Enter the following information:
- Reference Name ((an internal label used to identify and organise the invitation link)
- Passcode (optional)
- Status (defaults to Active. Change it to Frozen at any time to temporarily disable the link.)
- Channel Manager (optional)
Next, select the projects you want to share.
Click Confirm to create the invitation link.
📤 Step 3 – Share the Invitation
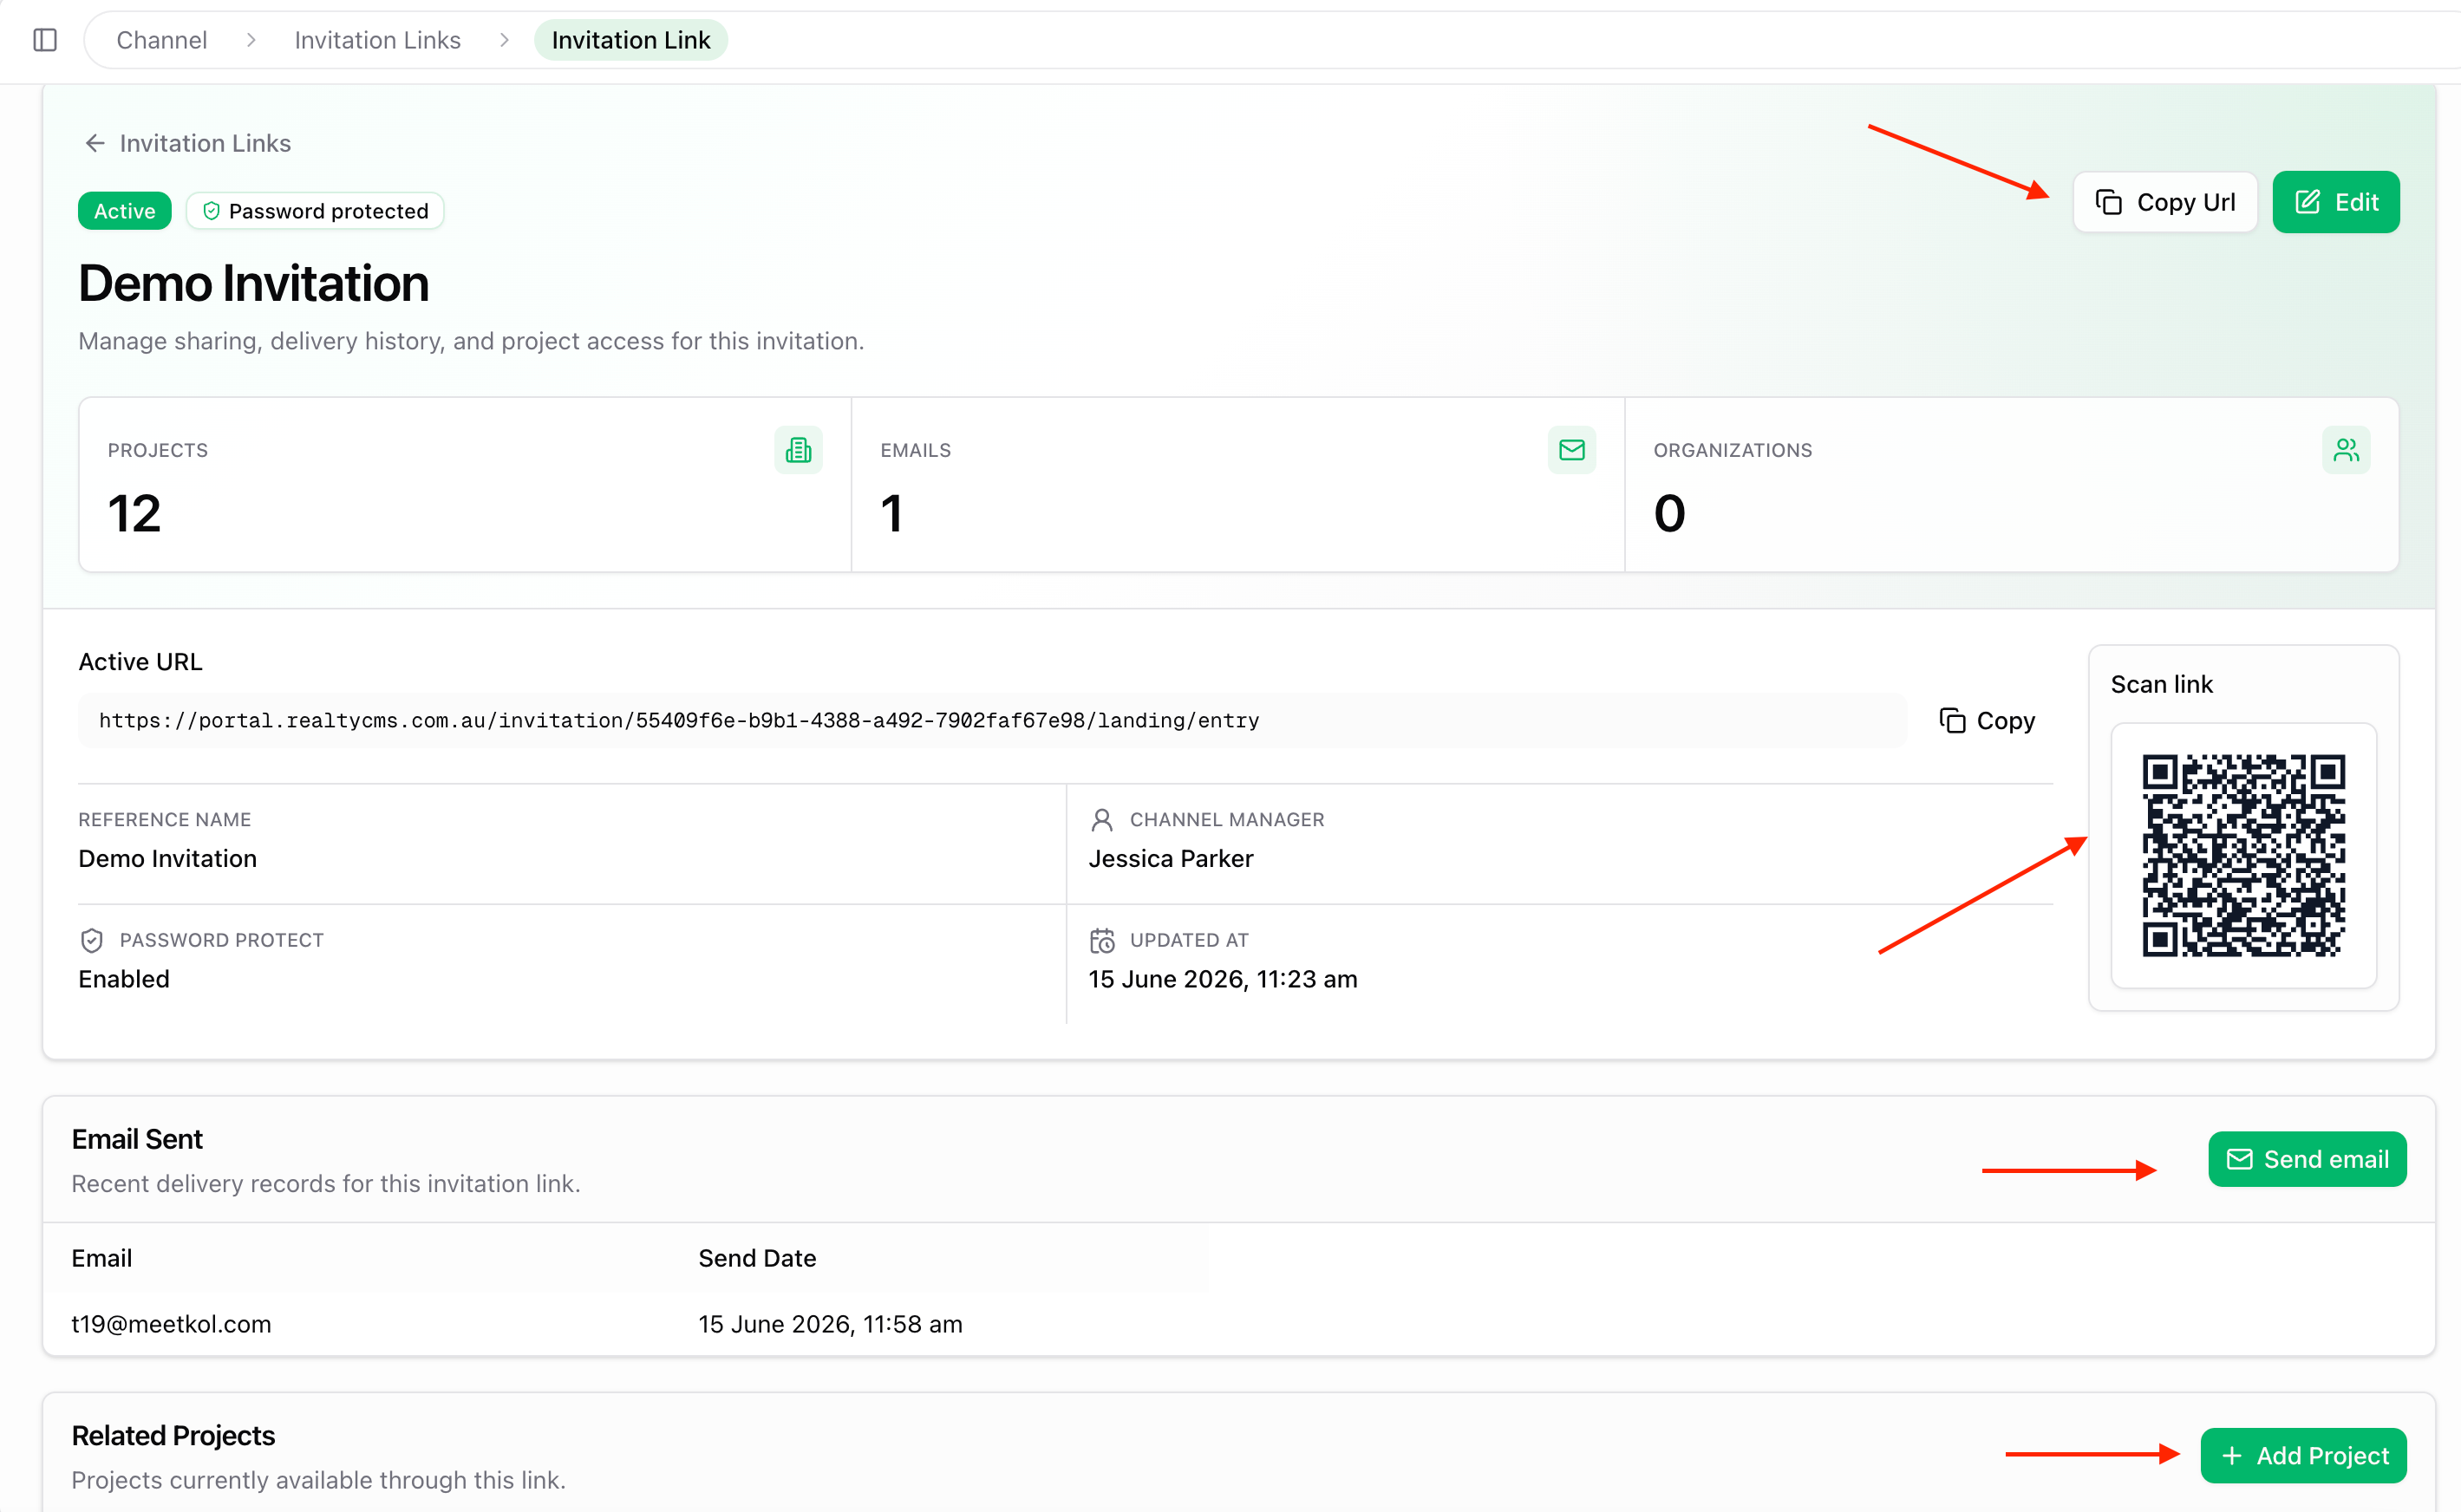
Once the invitation link has been created, you can:
- Copy the invitation URL
- Share the QR code
- Email the invitation directly to recipients
QR codes are ideal for brochures, flyers, display suites and other marketing materials.
🔄 Synchronized Organisations
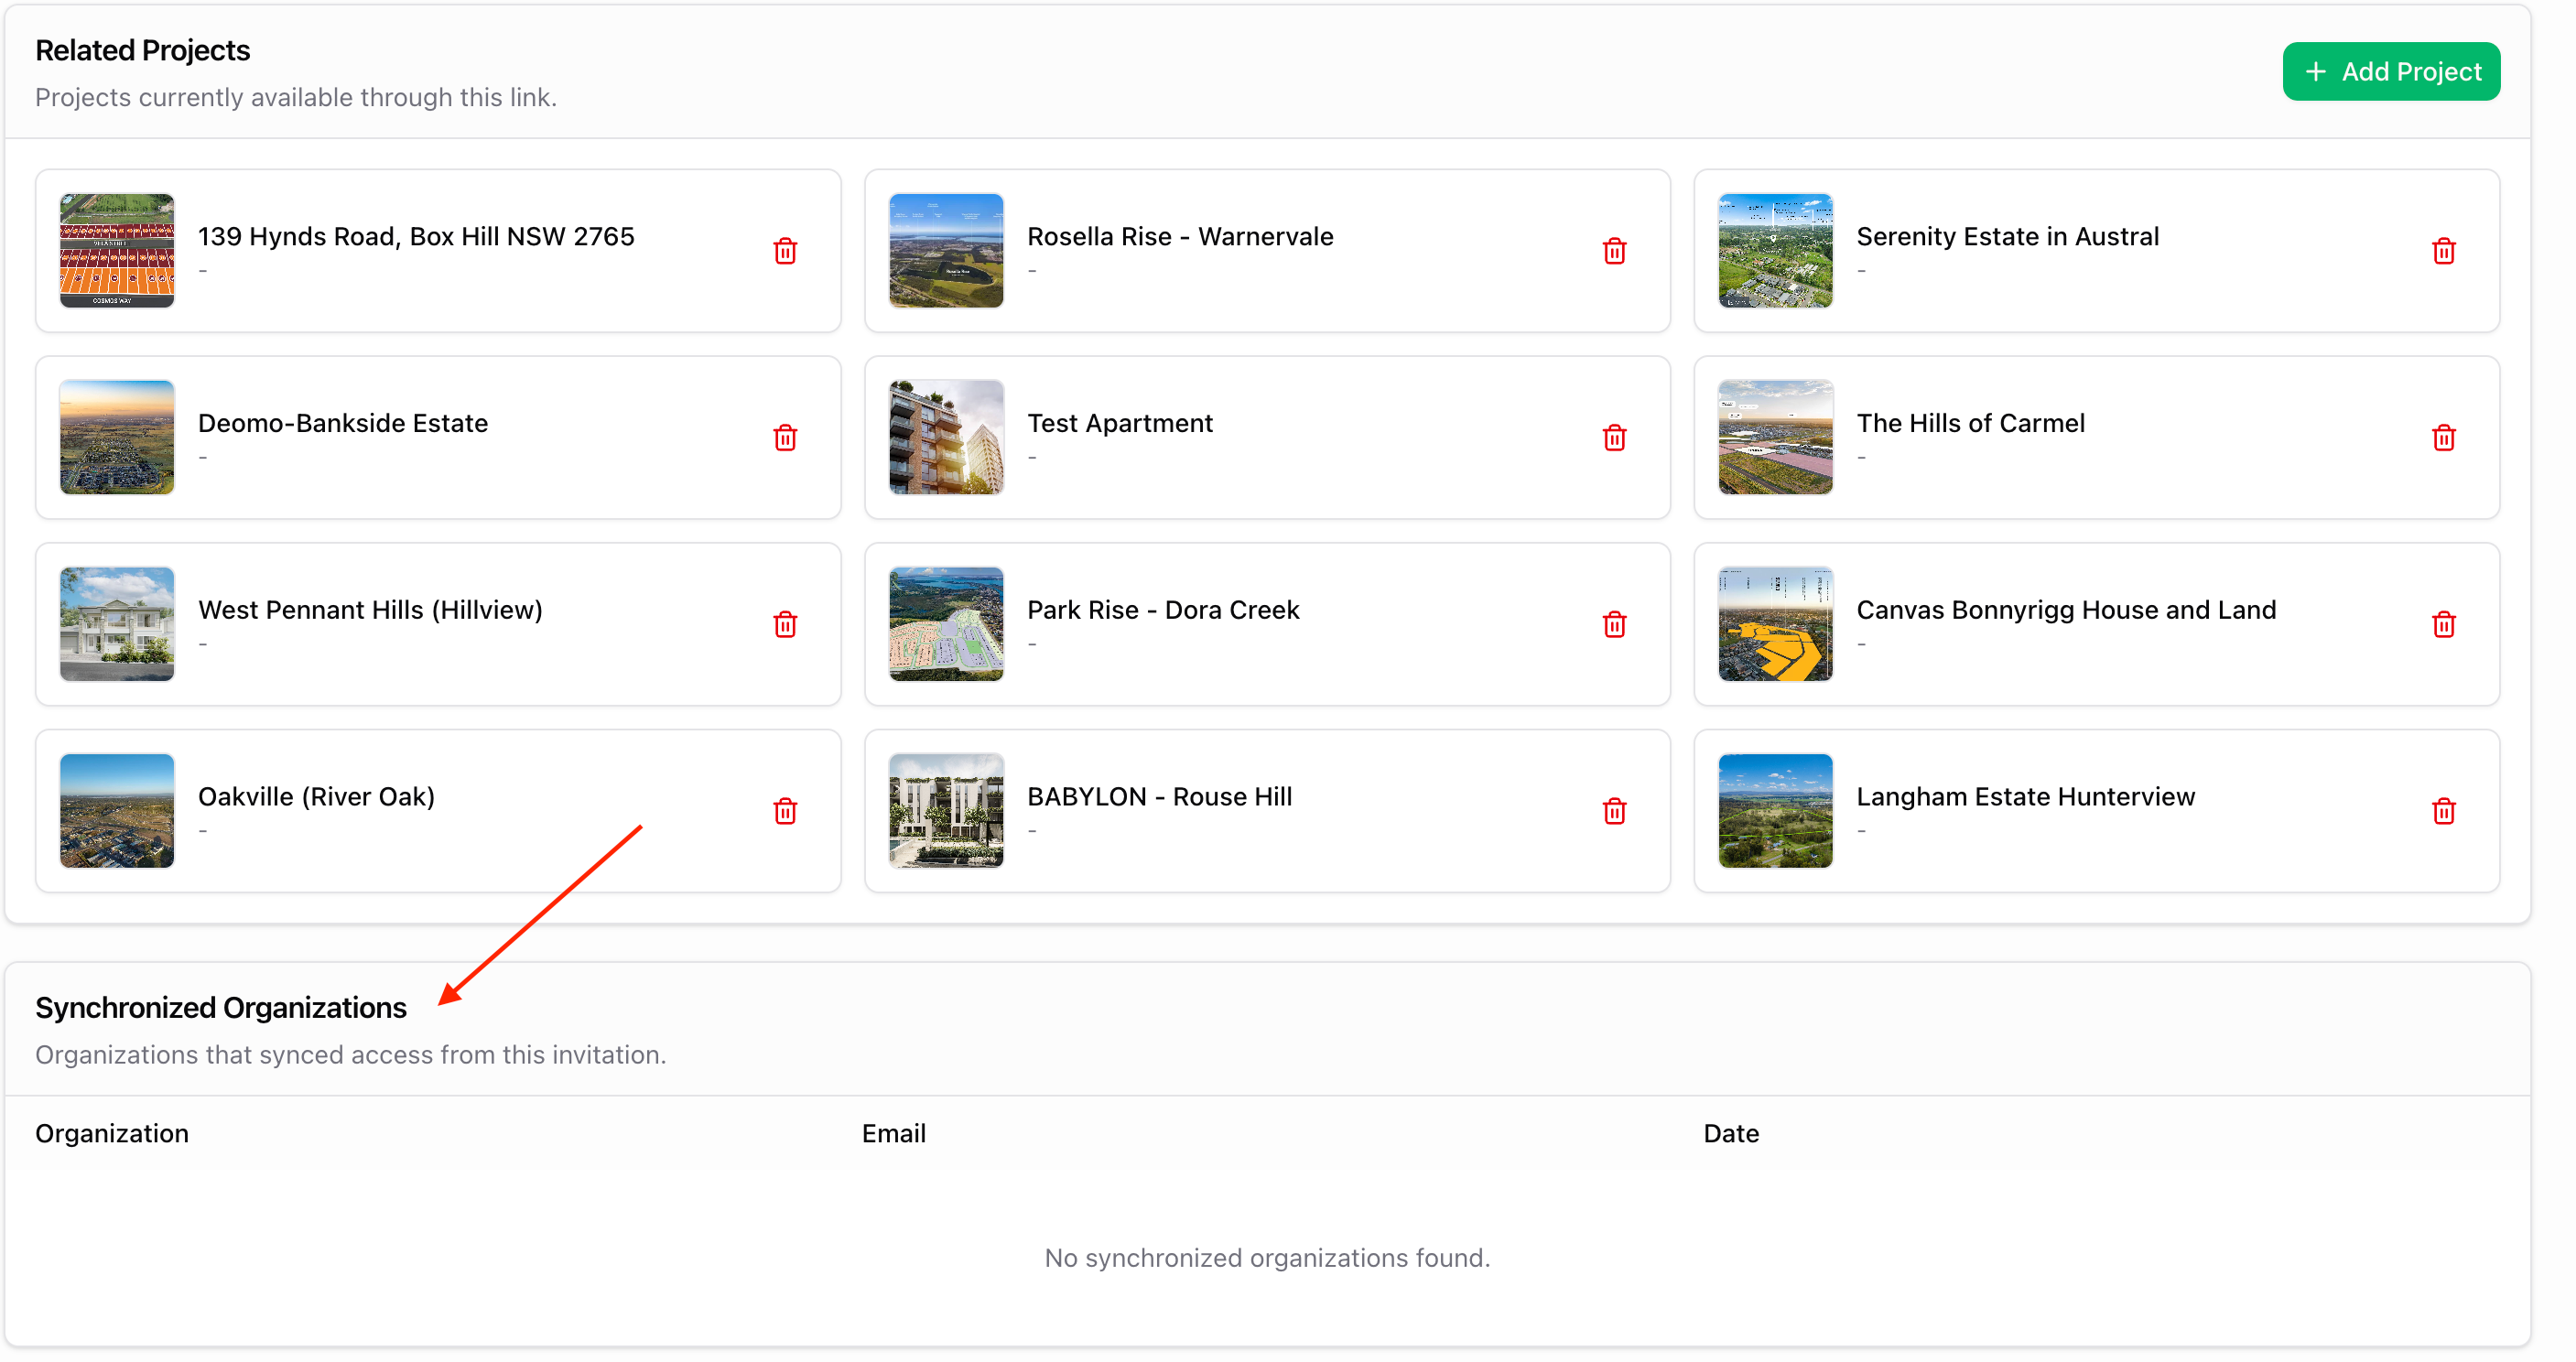
If someone creates a RealtyCMS account using your invitation link, their organisation will automatically appear under Synchronized Organisations.
This allows you to easily identify which organisations have connected through your invitation link.
✅ Done
You can now securely share projects using either method:
- Channel Management — Best for registered RealtyCMS users and ongoing collaboration.
- Invitation Links — Ideal for quick, account-free access.
Both sharing methods can be updated at any time as your projects or recipients change.