How to Generate an Invitation Link & QR Code
Nancy Xiao
Accounts Manager
Easily share selected projects with your partner companies using a secure invitation link.
You can also convert the link into a QR code for quick and seamless access.
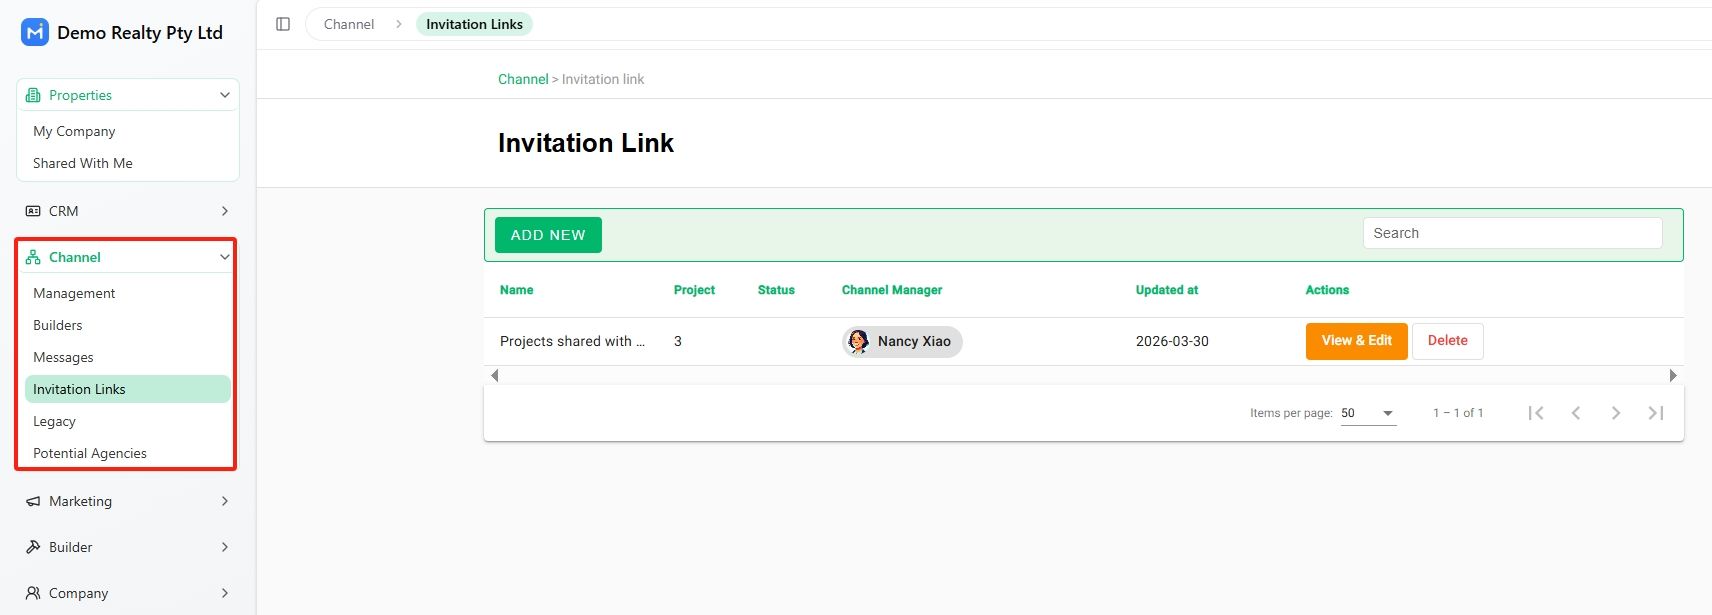
Step 1: Go to Invitation Links
Login to your account, from the left-hand menu, navigate to:
Channel → Invitation Links
Here, you can also view and manage all your existing invitation links.
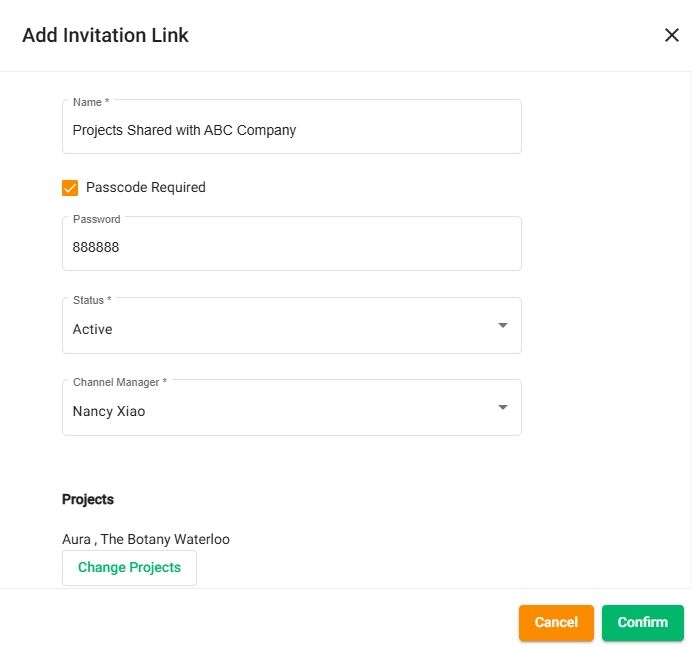
Step 2: Create a New Invitation Link
Click “Add New” and complete the following fields:
- Name
Give the link a clear and recognizable name
(e.g. “Projects shared with ABC Company”)
- Passcode Required (Optional)
Enable this if you want to protect access with a password
- Channel Manager
Assign the person responsible for this link
- Projects
Click “Select Projects” to choose which projects to share
Click “Confirm” to create the link.
Once created, the invitation link will appear in your list.
Step 3: Share the Invitation Link
Click “View & Edit” on the link.
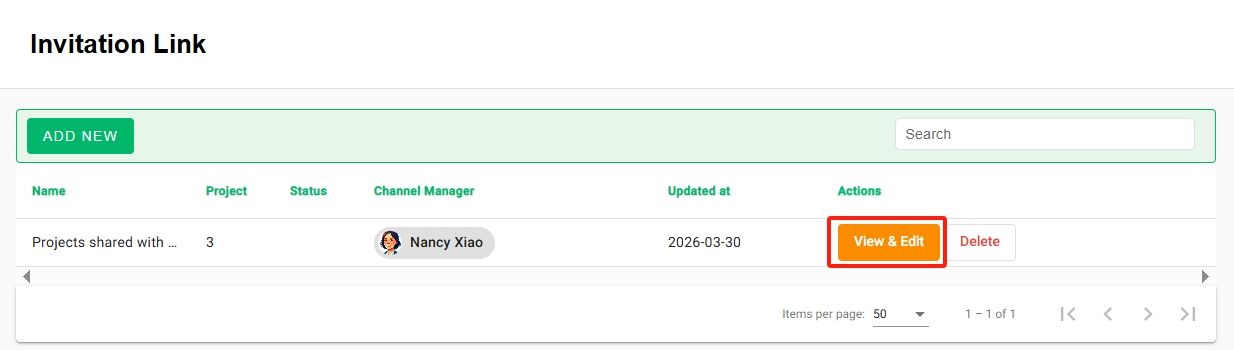
You can then:
- Copy the invitation URL
- Download or share the QR code
Send the link or QR code directly to your partners for instant access.
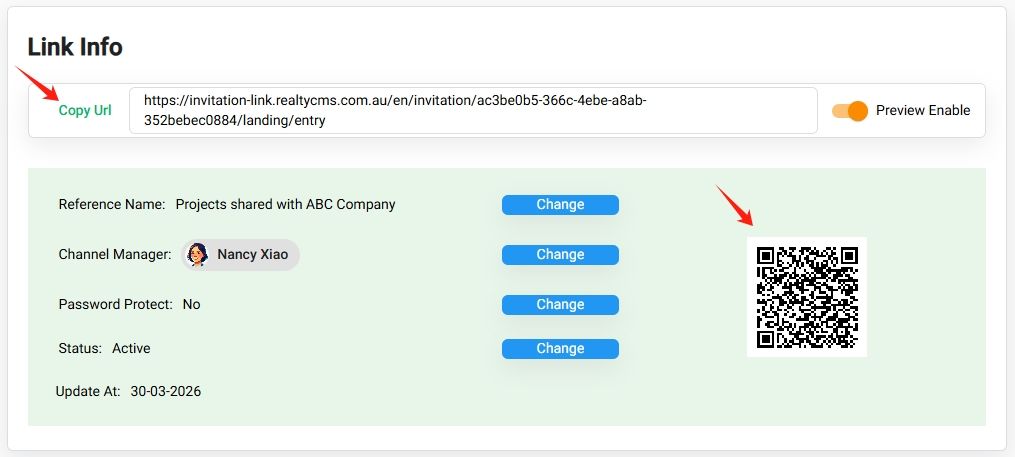
Note: Your invitation link and QR code stay constant.
Any updates you make to the shared projects will be automatically reflected—no need to regenerate or resend the link.
Use Cases
The QR code can be used in multiple scenarios:
- Printed on brochures or flyers
- Shared during presentations
- Used for quick mobile access by clients or agents
What Happens Next?
When your partner opens the link or scans the QR code:
- They can sign up for free or log in
- Access your shared projects via “Shared With Me”
- Always see the latest project updates automatically
💡 Best Practices
- Use clear naming for each invitation link (by partner or campaign)
- Enable passcode protection for sensitive or exclusive projects
- Create separate links for different partners to better manage sharing